1. File > New > Project > Java Project


2. File > New > Class

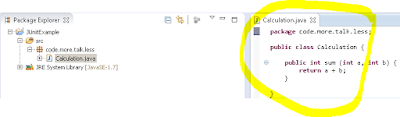
package code.more.talk.less;
public class Calculation {
public int sum (int a, int b) {
return a +
b;
}
}
File > New > Other > JUnit Test Case


 CalculationTest class:
package code.more.talk.less;
import org.junit.After;
import org.junit.Assert;
import org.junit.Before;
import org.junit.Test;
public class CalculationTest {
@Before
public void setUp() throws Exception {
System.out.println("Calling
Calculation Test");
}
@After
public void tearDown() throws Exception {
System.out.println("Finished
Calculation Test");
}
@Test
public void test() {
int result = new Calculation().sum(1,
2);
Assert.assertEquals(3,
result);
}
}

 Change test method expected value and run test again. See the testFailure.
@Test
public void test() {
int result = new Calculation().sum(1,
2);
Assert.assertEquals(4,
result);
}

File > New > Other > JUnit Test Suite

Add a new method in CalculationTest class:
@Test
public void test2() {
int result = new Calculation().sum(1,
2);
Assert.assertEquals(3,
result);
}
> Run AllTests class. You'll see two reults for test(failure) and test2(successful ) methods.
- To ignore a test just add an @Ignore: You can add it before or after @Test.
- In test suite you can run more then one class. @SuiteClasses({ class1.class , Class2.class })
- You can add timeout for the test method. Example:
@Test(timeout=1)
public void test2() {
int result = new Calculation().sum(1,
2);
try {
Thread.sleep(1000);
}
catch
(InterruptedException e) {
e.printStackTrace();
}
Assert.assertEquals(3,
result);
}